
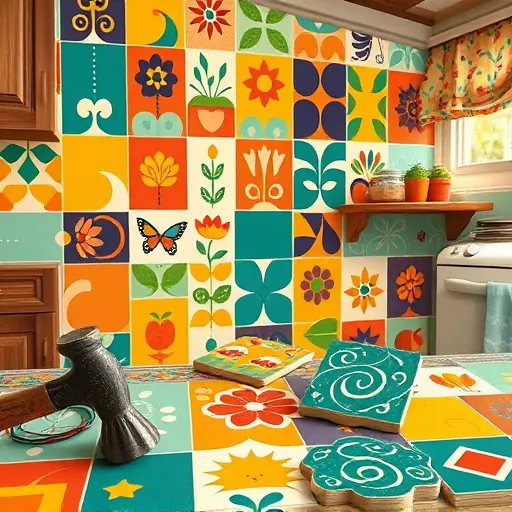
Backsplash Installation: Easy & Stylish Tips for a Beautiful Kitchen
By Daniel Hogenson, founder · Published July 6, 2026
What Is Backsplash Installation and Why Is It Important for Your Kitchen?
Backsplash installation is more than just an aesthetic decision; it serves both practical and decorative purposes in your kitchen. Essentially, a backsplash is a protective surface installed on the wall area behind your countertops and stove. It guards your walls against spills, stains, grease, and moisture, making cleaning easier and extending the life of your kitchen surfaces.
Beyond protection, a well-chosen backsplash adds a focal point that expresses your personal style. Whether you prefer sleek modern tiles, rustic brick tiles, or colorful mosaics, the right backsplash can transform the ambiance of your kitchen, complement your cabinetry, and harmonize with your countertops. At RenovatePros, we specialize in backsplash installation that balances beauty and functionality, ensuring your kitchen update is both easy and stylish.
How Do I Choose the Best Material for My Kitchen Backsplash?
Selecting the right material for your backsplash depends on your lifestyle, design preferences, and budget. Each material offers distinct benefits and challenges. Here are some popular options:
- Ceramic and Porcelain Tiles: These are classic choices offering durability, a wide range of styles, and easy maintenance. Ideal for homeowners who want a timeless look with low upkeep.
- Glass Tiles: Perfect for a sleek, modern style. Glass tiles reflect light beautifully but need professional installation due to their delicate nature.
- Natural Stone: Options like marble, granite, or slate add luxury and natural texture. They require sealing but provide exquisite visual depth.
- Metal Tiles: Stainless steel or copper backsplashes are perfect for industrial or contemporary kitchens. They are easy to clean and heat-resistant.
- Peel-and-Stick Backsplashes: Budget-friendly and quick to install, these offer convenience for DIY projects, but they may not be as durable as traditional options.
Have you ever wondered what makes quartz-based backsplashes so desirable? Their resistance to stains and scratches makes them ideal for active kitchens. On the other hand, glass tiles reflect light brilliantly yet require meticulous grout sealing.
Considering these choices, RenovatePros can guide you in custom kitchen renovation to match your preferred style and practical needs, ensuring your backsplash is a perfect fit for your kitchen's overall design.
What Are the Easy Steps for a Successful DIY Backsplash Installation?
If you’re eager to take on a DIY project, installing a backsplash can be a rewarding task that elevates your kitchen’s look without overwhelming complexity. Here’s a straightforward process to help you get started:
- Prepare Your Walls: Remove any old backsplash material, clean the surface thoroughly, and repair any holes or cracks. A smooth and dry wall ensures better adhesion.
- Measure and Plan: Measure the area accurately and plan the tile layout, accounting for grout lines and potential cut tiles at edges.
- Gather Materials and Tools: Typical items include tile adhesive (mastic or thin-set mortar), tiles, a notched trowel, tile spacers, a level, a tile cutter, grout, and a sponge.
- Apply Adhesive and Set Tiles: Spread the adhesive evenly with a trowel and press tiles firmly into place, using spacers for consistent gaps and regularly checking with a level.
- Cut Tiles as Needed: Use a tile cutter for edge pieces to maintain a polished look.
- Let Adhesive Dry: Wait 24 hours for the adhesive to set.
- Apply Grout: Spread grout across tiles, pressing it into spaces with a rubber float and wiping away excess with a damp sponge.
- Final Clean and Seal: Clean haze residue from the tiles and seal grout lines if needed to protect against moisture and stains.
While DIY backsplash installation can be satisfying, some projects benefit from professional expertise. RenovatePros offers expert kitchen remodeling to guarantee flawless results and greater longevity of your backsplash.
How Can I Style My Backsplash to Match My Kitchen Decor?
Styling your backsplash is a wonderful opportunity to inject personality into your kitchen without a complete overhaul. Here are several creative ways to think about your backsplash design:
- Match Your Countertops: Coordinate the backsplash material or color with your countertop surface to create a seamless, harmonious look. For example, pairing a neutral quartz countertop with mosaic tile accents can add subtle visual interest.
- Make a Bold Statement: Use vivid colors or intricate patterns in your backsplash to create a focal point. This works especially well in minimalist kitchens with monochromatic cabinetry.
- Consider Shape and Texture: Subway tiles with beveled edges, herringbone patterns, or textured 3D tiles add depth and dimension.
- Incorporate Lighting: Installing under-cabinet lighting highlights the backsplash’s texture and color, amplifying the atmosphere.
For those considering broader renovations, our luxury kitchen remodeling services at RenovatePros can help you unify your backsplash with cabinetry, countertops, and lighting for a stunning final result.
What Common Mistakes Should I Avoid When Installing a Kitchen Backsplash?
To help you avoid pitfalls during backsplash installation, keep these common mistakes in mind:
- Inadequate Surface Preparation: Skipping proper cleaning and wall repair can cause tiles to loosen or unevenness in the finished look.
- Poor Measurement: Incorrect measurements or failure to plan tile layout can result in awkward cuts and wasted material.
- Using the Wrong Adhesive: Different tile types require specific adhesives—using the wrong kind reduces durability.
- Ignoring Grout Maintenance: Not sealing grout or choosing inappropriate grout types can lead to staining and mold growth.
- Rushing the Job: Skipping drying times or rushing installation impacts the longevity and visual appeal of the backsplash.
Trusting RenovatePros for your backsplash ensures meticulous preparation, precise installation, and ongoing advice to maintain your kitchen’s beauty over time.
How Do I Maintain and Clean My Kitchen Backsplash for Long-lasting Beauty?
Maintaining your backsplash is essential to prolong its appearance and functionality. The cleaning method varies by material, but here are general recommendations:
- Regular Wiping: Use a soft cloth and mild detergent to clean dirt and splatters after cooking.
- Avoid Harsh Chemicals: Stay away from abrasive cleaners or scouring pads that might scratch or discolor tiles.
- Seal Grout Lines: For porous materials, sealing grout prevents stains and mildew. Reapply sealant annually or as needed.
- Address Stains Promptly: Clean spills immediately to avoid difficulty removing baked-on grease or sauces.
- Use Specialized Cleaners: For glass or natural stone backsplashes, select cleaners formulated for those surfaces.
- Inspecting grout lines annually for cracks or damage and repairing if necessary.
Professional upkeep is also available through RenovatePros, ensuring your backsplash remains a stunning feature within your kitchen.
What Additional Kitchen Improvements Complement a New Backsplash?
A backsplash installation often inspires broader kitchen updates. Here are complementary projects you might consider:
- Cabinet refacing or replacement to refresh the kitchen’s overall style.
- Countertop installation to harmonize with your chosen backsplash material or color palette.
- Kitchen island installation for added workspace and a central design statement.
- Kitchen layout reconfiguration to enhance flow, function, and ergonomics.
RenovatePros offers comprehensive services to help you craft a cohesive and beautiful kitchen designed around your installed backsplash.
How Can Proper Adhesive and Grouting Techniques Impact Your Backsplash?
Here lies a secret of flawless backsplash installation: the adhesive and grout must be carefully selected and applied to suit both the tiles and kitchen environment.
Cheap glue or improper application can result in tiles loosening or sliding, while grout improperly sealed can absorb moisture leading to discoloration and mold. Homeowners often underestimate the critical role of surface preparation before adhesive application, including priming and drying time.
The choice of grout—sand or unsanded—depends on tile spacing, emphasizing the necessity of technical knowledge. Maintenance-friendly, stain-resistant grouts might cost more but pay off in longevity and ease.
Frequently Asked Questions About Backsplash Installation
How long does a typical backsplash installation take?
Installation time varies with backsplash size and material but generally ranges from one to three days. Complex tile patterns or larger areas may take longer for preparation, setting, and drying.
Can I install a backsplash over existing tiles?
In many cases, it’s possible to install a new backsplash over existing tiles if they are in good condition and properly cleaned. However, assessing the surface for stability is important, and sometimes removal is recommended for optimal results.
Is backsplash installation messy or disruptive?
While some dust and debris are inevitable, experienced professionals like RenovatePros use protective coverings and efficient cleanup methods to minimize disruption, keeping your home clean and organized.
What grout color should I choose for my backsplash?
Grout color can dramatically affect the backsplash’s appearance. A matching grout creates a smooth, unified look, while a contrasting grout outlines each tile for a patterned effect. Your choice depends on your style preference.
Do I need to seal my backsplash?
Sealing is essential for porous materials like natural stone and some grout types to prevent staining and water damage. Non-porous tiles like glazed ceramic often do not require sealing.
What backsplash styles are best for small kitchens?
Light-colored, reflective surfaces like glass tiles or white subway tiles can visually expand compact spaces. Simple patterns avoid overcrowding, making the kitchen feel open and airy.
Are there eco-friendly backsplash options?
Yes, recycled glass tiles, sustainably sourced natural stone, and certain ceramics provide environmentally conscious choices without sacrificing style or quality.
What are the best backsplash materials for high-moisture kitchens?
Materials like ceramic, glass, and quartz perform well in humid environments due to their water resistance and ease of cleaning.
Can backsplashes be installed on walls beyond the kitchen?
Absolutely. Backsplash materials and installation techniques can be adapted for bathrooms, laundry rooms, or even decorative wall accents throughout the home.
Ready to transform your kitchen with expert backsplash installation? Contact RenovatePros today for a consultation, and let us help you achieve the stylish and functional kitchen you deserve!